Now that we have a basic feel of Xcode and creating app project. We will create a project and run them. Let's create another project. We will be going through creating a new project once again.
Creating Our Second Project
To create our second project, we launch Xcode first. Once the program is launched, the screen as below will appear:

Select "Create a new Xcode project" as shown above. The following dialogue box will appear:
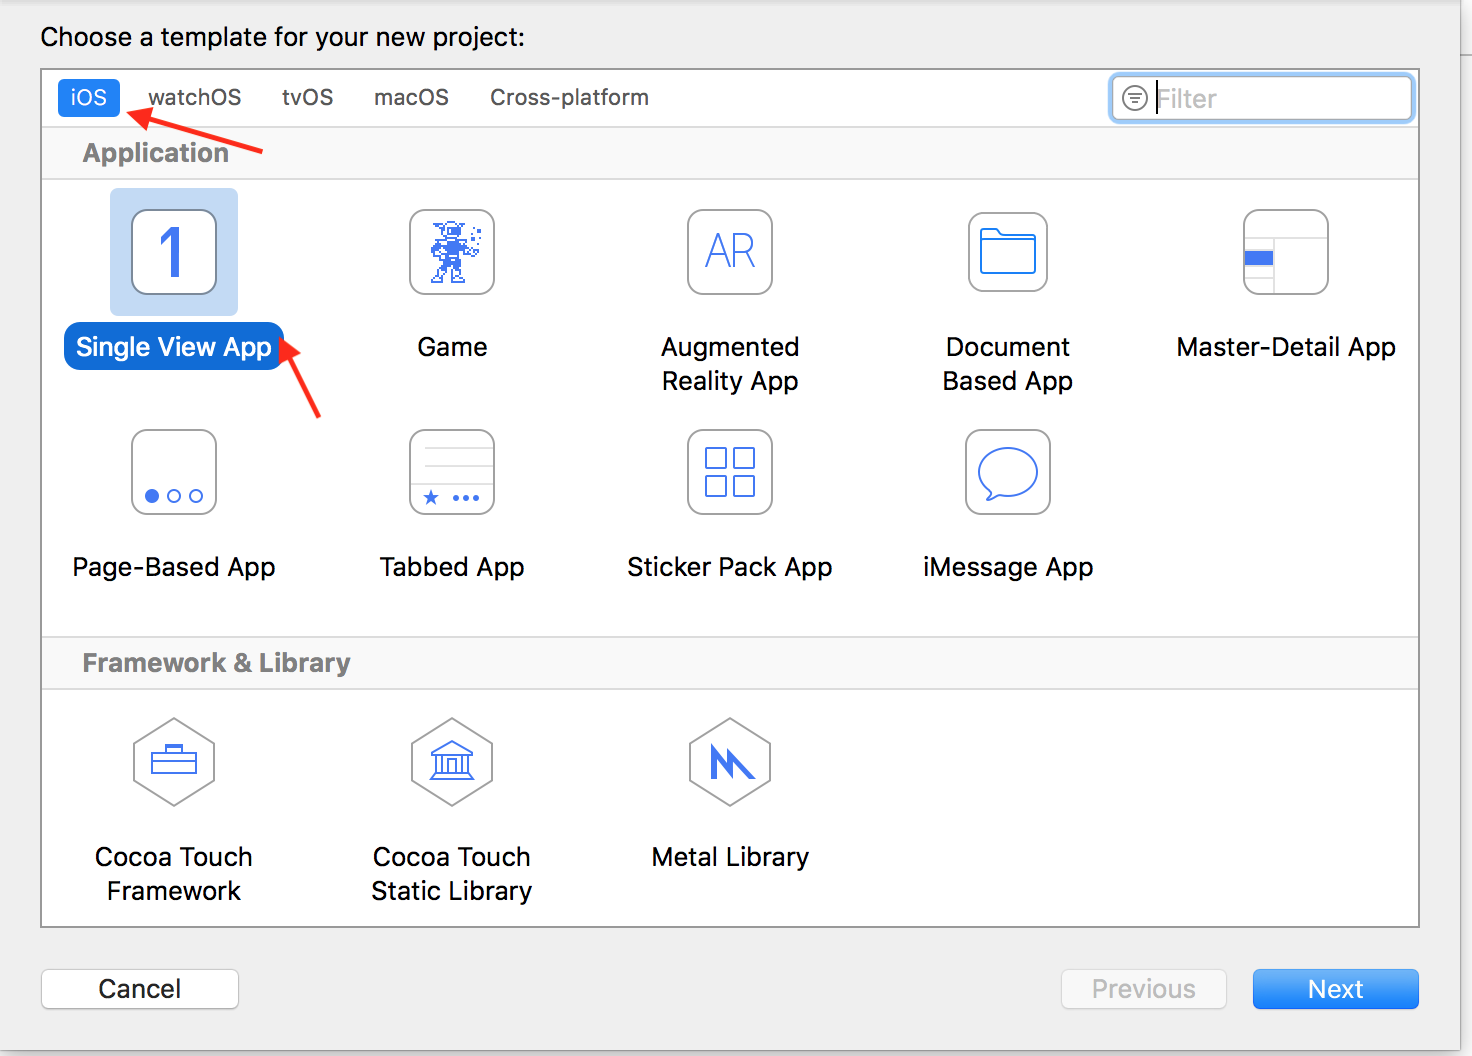
Make sure that iOS and Single View App is selected. Click Next.

In this page, we need to specify the project name. If your organization identifier is blank, you can put in the same as your organization name.
Make sure "Language" is set to Swift. We will not be using any of the option below, for simplicity we can checked "Include Unit Tests" . Click Next.

We need to select the location of the file. For now, we can unchecked "Create Git repository on my Mac".
Click "Create" when done. Once the project is created, we can run the project immediately.
Running App
Once the project is created, the system will automatically create the basic template of a single view app. We can run the app immediately by clicking on the play button as shown below.

Please note that we can choose different type of iPhone simulator to test the effect of our app.
Once the play button is clicked. The system will launch an iPhone simulator. Once the simulator is launched, the simulated app will appear as follows:
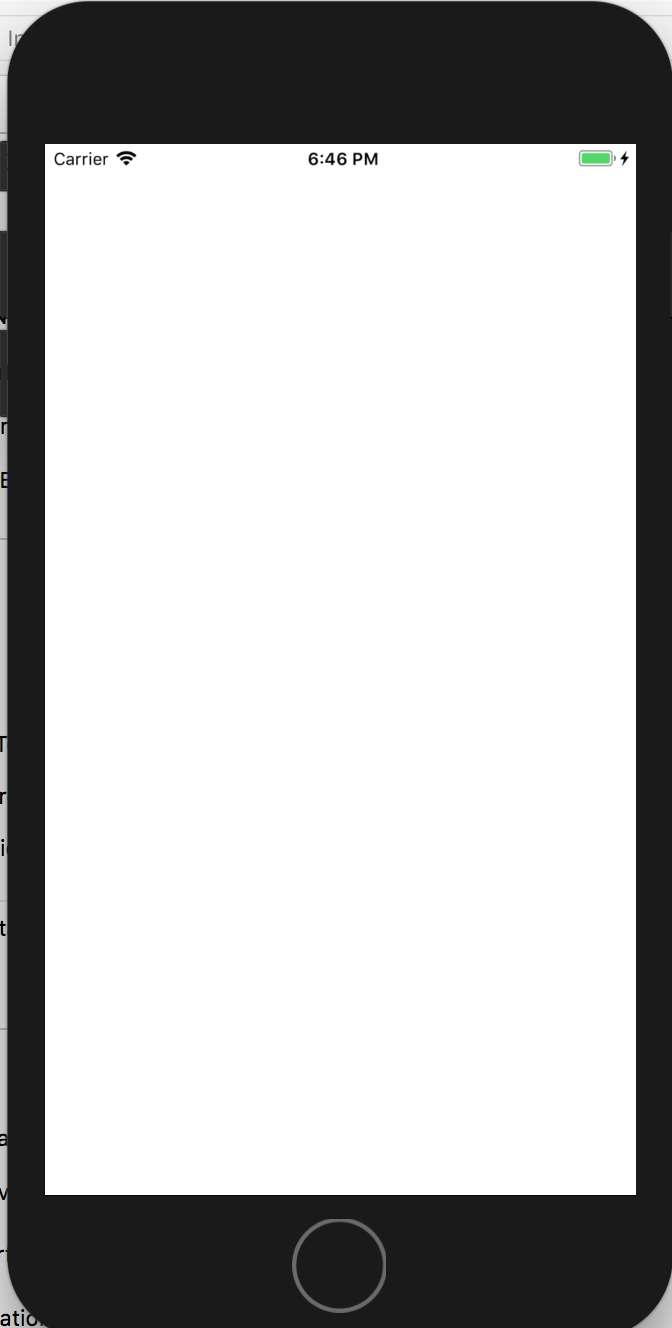
Since we have not add anything to the app. The empty app will run as above.
We can stop the app by clicking on the stop button as shown below:

Once stop button is click, the app will stop running.
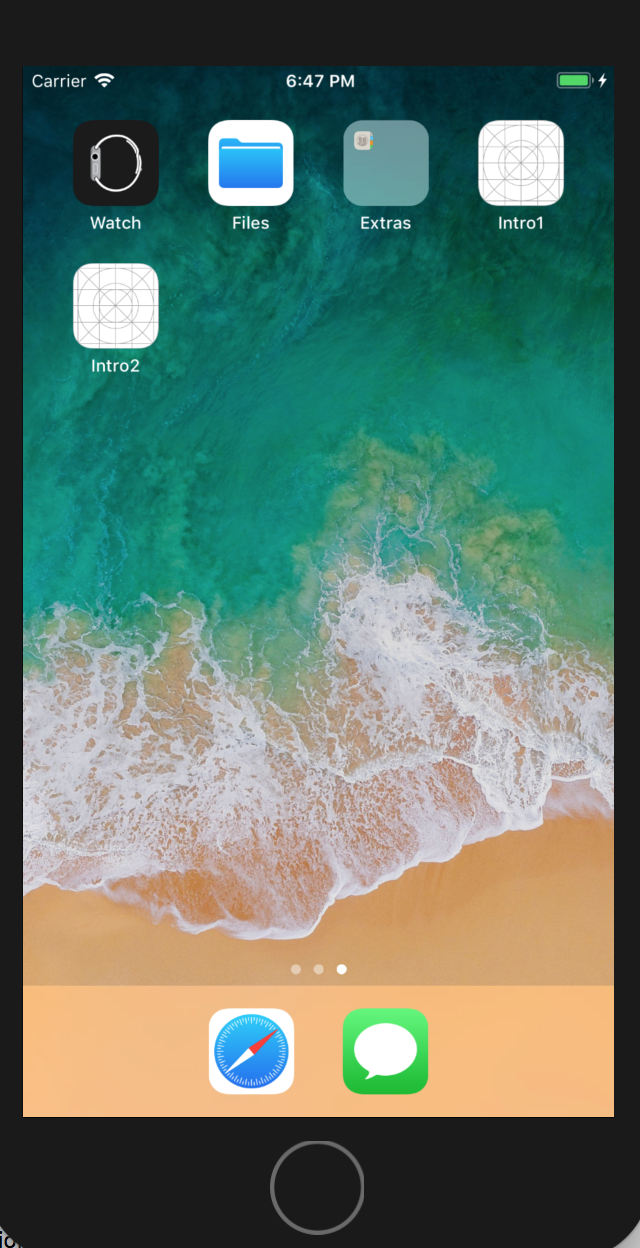
The simulator might be still running as shown on the dock.
The simulator will go back to the home screen as shown below:
Process of Running App
Please note that the process of running an app consist of 2 part. For the first part, the Xcode will build the app first. Once the build is successful, the system will automatically run the app by launching the simulator.
Any error occurs during the building phase will be labeled as compiled error. Any errors that happen when the app is running is known as runtime error.
We can separate the 2 process by building the project first. We can build the app by using the menu dropdown under "Product". Click Build (cmd+b) to just build the project.
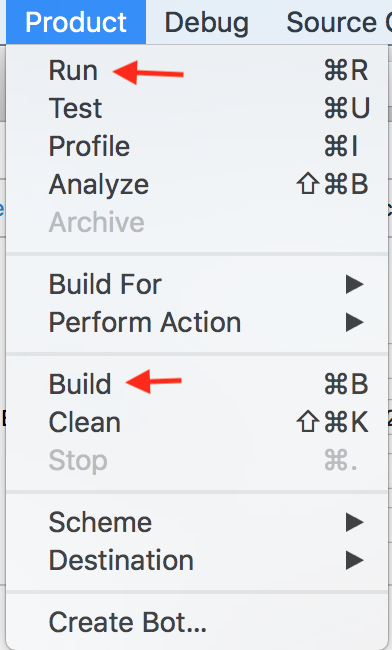
Once we have cleared all the compiled error, we can then run the app by clicking on Run (cmd+r).
Using App Simulator
As shown earlier, we can choose which device to simulate by selecting on the device as shown below.
A drop down list will appear allowing us to select the device which we want to test. If the device is not listed, it means that the device is not supported.

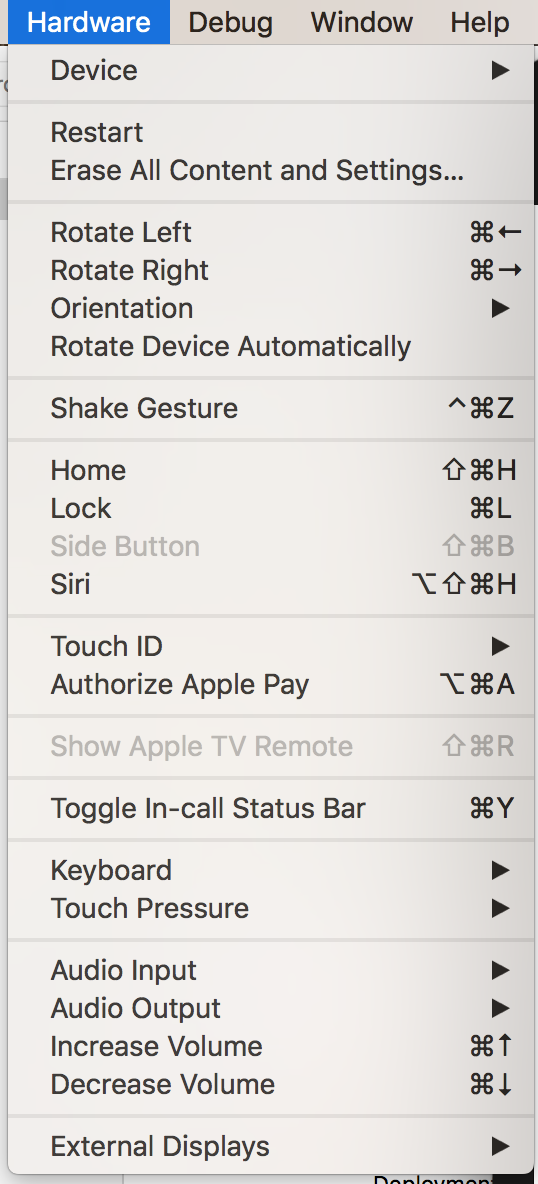
Once the app is running, we can test the app by changing the hardware behavior. We can do so by selecting "Hardware" from menu.
If our app supports both portrait and landscape mode, then we can rotate the device and observed the change on the app.
Alternatively, we can just change the orientation under "Orientation" as shown below:
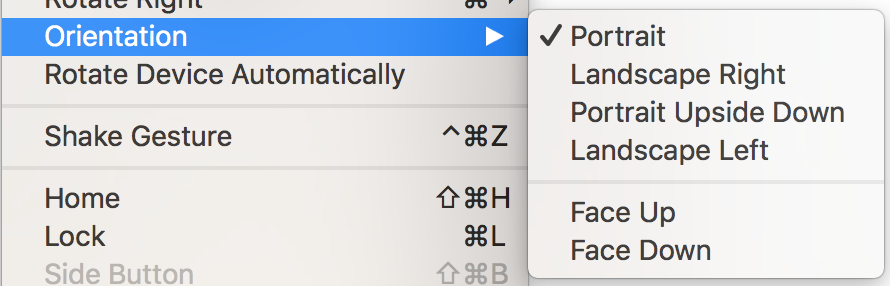
We can try different hardware orientation to the test effect on our app.
While testing app, once common feature we want to the is the on screen keyboard. At time, the onscreen keyboard did not appear because the simulator recognize out system keyboard. To toggle the onscreen keyboard, select "Keyboard" and select "Toggle Software Keyboard" .

Onscreen keyboard will appear when toggle. This only work for visual object that support keyboard such as text field.
The video below shows how to run an empty app and work with iPhone simulator.
***
No comments:
Post a Comment