Object Oriented Programming
Object oriented programming is a programming methodology that simulate our real world by grouping the functionality and properties into classes. An object instance will be created based on these classes.
We can classify and transpose the real world characteristics into properties and methods. Besides transport vehicle, we can perform similar classification on animals, plants, machines and even social structure.
In Object Oriented Programming (OOP), we define or describe the characteristics of a class. We group the related variables (properties) and function (methods) together to form a basis of class. Class is just definition, we cannot work on class. We must create an instance/object base on the class.
An instance/object is the working copy of the class. It is behave like a variable or function. We can read properties or set properties. We can also call function.
OOP consist of 4 basic principles, they are abstraction, encapsulation, inheritance and polymorphism.
Abstraction allow users of the class to use the class without knowing the details of the implementation of methods. Users of the class should be able to create instance or subclass and expects the same behavior from the inherited class.
Encapsulation isolated all variable and enclose them in the class. The principle of encapsulation encourage programmers to hide unnecessary properties or internal variables. By implementing encapsulation, users of the class will only know the key properties that requires input. For methods, users of the class only need to know the required parameters or input of the function and the result the function could produce. Using encapsulation, we can prevent programmers from interfering with the properties and it make refactoring the code much easier.
Inheritance allows properties and method to pass down the class without the need of rewriting it. Users of the class can also override methods that are specific to the subclass. This is the basic principle for reusing the code. For example the windows in our PC or phone are created using object class. The content of each window is different but the interface of each window is the same with a close, maximise and minimise button. This also standardise the interface. If changes is required at the higher class, we can always modified the methods and recompile all the related code. User of the class need not amend the code for each instance and make software easy to maintain.
Polymorphism says that we can treat a group of instance that belong to a same class hierarchy as base class or subclass. For example, we can count all the living things using the base class. We can also work on the subclass of mammals. While grouping the instance together, we can also ask each object to behave according to its characteristics or we can get all the instance object to perform some function that is common across the board.
Designing Object Oriented Program with UML
UML is a graphical methodology to design an object oriented program. We will not be going through the entire UML for OOP design. However, we will introduce the basic diagram that explains a class.
Ley say we have a basic class which consist of properties name, address, and contact. We will also implement method to display the contact by name. In addition, we would also implement methods that change the name, address or contact. The basic UML diagram is as follows:
Let's say, we create a subclass and add 2 new entries. They are twitterHandle and instagramHandle. For subclass we will link 2 diagram as shown below:
There are more details about how UML diagrams are constructed, however, it is rarely used as a full implementation. At least we need to know how the diagram looks like.
Encapsulation and Abstraction
To design a well encapsulated class, we will only need to expose key properties that programmers will need to supply value. All internally used properties will not be exposed. In Swift, we can hide the properties using private keyword.
Example:
// Constant parameter Internal used only
private let maxLengthName = 50
|
For important properties, we can allow programmer to query the value but not to set the values. We can create methods that perform the settings of value. This type of design pattern provides a standard interface for programmer to interact with the class instance. We use the keyword private(set) to prevent programming from setting the properties directly.
Example:
// Properties
private(set) var name = String() private(set) var contact = Int() |
For the example above, we can construct the class as follows:
class BasicContact {
// Properties private(set) var name = String() private(set) var contact = Int() // Constant parameter Internal used only private let maxLengthName = 50 // Init init() { self.name = "noname" self.contact = 0 } init(name: String, contact: Int) { self.name = name self.contact = contact } // Methods func setName(name: String) { self.name = name } func setContact(contact: Int) { self.contact = contact } func displayContact() { print("The contact of \(name) this contact is \(contact)") } func displayIdentity() { print("This instance is Basic") } } |
If we try the implement the class as shown below, we will get errors:
var contact1 = BasicContact()
contact1.name contact1.contact contact1.displayContact() contact1.maxLengthName contact1.name = "test" |

We cannot query the internal number because we add private in front of the property definition. We cannot set the name because our keyword private(set) disallow the setting of property directly. To change the name, we use the method setName() instead. Please check our improved implementation:
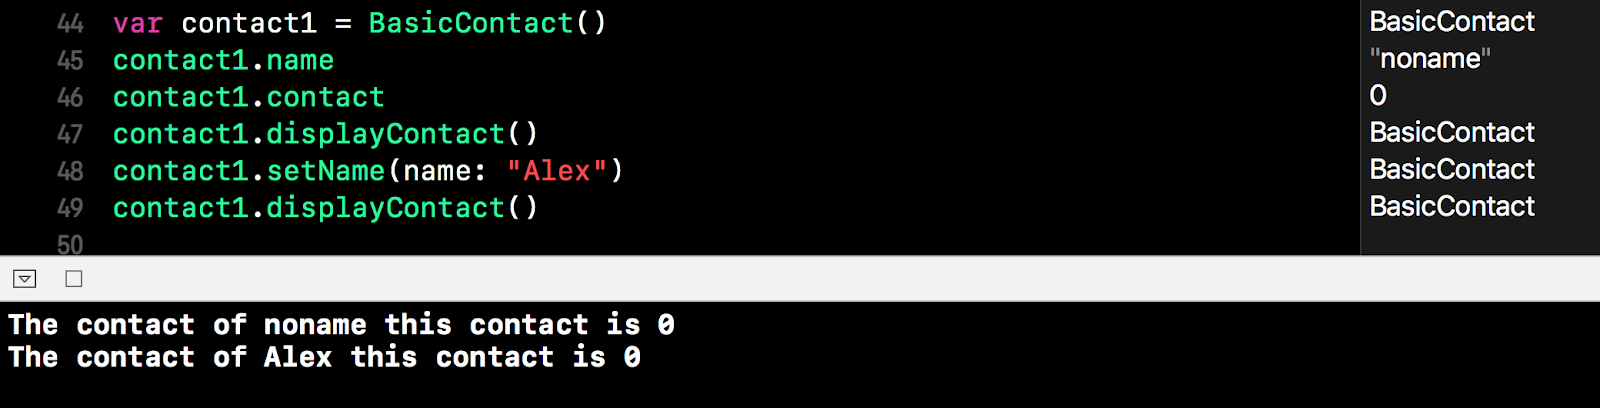
var contact1 = BasicContact()
contact1.name contact1.contact contact1.displayContact() contact1.setName(name: "Alex") contact1.displayContact() |
We create another instance as follows:
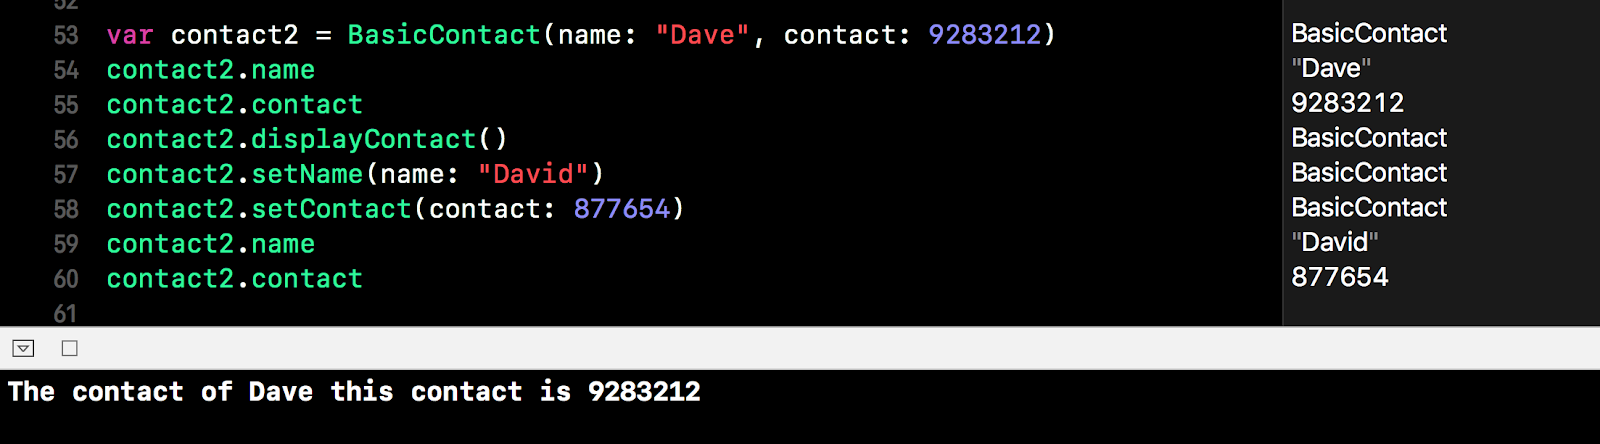
var contact2 = BasicContact(name: "Dave", contact: 9283212)
contact2.name contact2.contact contact2.displayContact() contact2.setName(name: "David") contact2.setContact(contact: 877654) contact2.name contact2.contact |
In this design, we hide all internal properties and we only expose important properties. In addition, we provide an interface for user to change the name and contact. This way, programmers only need to know the key properties to read and the related method to work with the instance.
Inheritance
We have run through the features on inheritance, for the sake of completeness, we will implement a subclass known as ExtendedContact.
class ExtendedContact: BasicContact {
// Property private(set) var twitterHandle:String? private(set) var instagramHandle:String? // Init override init() { super.init() self.twitterHandle = nil self.instagramHandle = nil } init(name: String, contact: Int, twitter: String?, instagram: String?) { super.init(name: name, contact: contact) self.twitterHandle = twitter self.instagramHandle = instagram } func changeTwitterHandle(newTwitter: String?) { self.twitterHandle = newTwitter } func changeInstagramHandle(newInstagram: String?) { self.instagramHandle = newInstagram } func doSomethingTiwtter() { print("This will perform some task that is related to Twitter") } func doSomethingInstagram() { print("This will perform some task that is related to Instagram") } override func displayIdentity() { print("This instance is extended social contact") } } |
The implementation of the subclass is as follows:
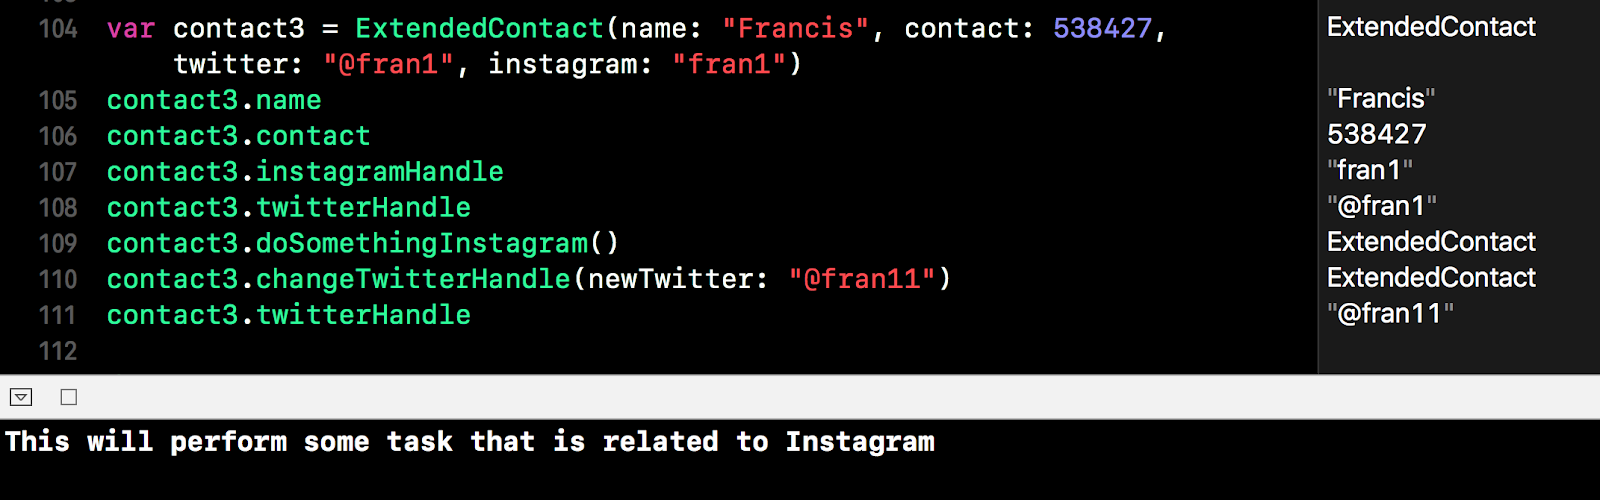
var contact3 = ExtendedContact(name: "Francis", contact: 538427, twitter: "@fran1", instagram: "fran1")
contact3.name contact3.contact contact3.instagramHandle contact3.twitterHandle contact3.doSomethingInstagram() contact3.changeTwitterHandle(newTwitter: "@fran11") contact3.twitterHandle |
We can also create another subclass that is base on basic contact.
The design on the new class is as follows:
class ImportantContactInfo : BasicContact {
// Property private(set) var address:String? private(set) var socialSecurity:Int? // Init override init() { super.init() self.address = nil self.socialSecurity = nil } init(name: String, contact: Int, address: String?, socialSecurity: Int?) { super.init(name: name, contact: contact) self.address = address self.socialSecurity = socialSecurity }
// Methods
func changeAddress(newAddress: String?) { self.address = newAddress } func changeSocialSecurity(admendedSocialSecurity: Int?) { self.socialSecurity = admendedSocialSecurity } override func displayIdentity() { print("This instance contain important info") } } |
To implement the new subclass, we have the following:
var contact4 = ImportantContactInfo(name: "Simon", contact: 7238842, address: "Alberta", socialSecurity: 938239420)
contact4.name contact4.socialSecurity contact4.address |

Polymorphism
Polymorphism work when we have multiple instance that are created under different subclass. Now lets create some contacts as follows:
// Implementation of polymorphism
var c1 = ExtendedContact(name: "dave", contact: 2567341, twitter: "@dave", instagram: "dave2") var c2 = ExtendedContact(name: "denise", contact: 472983, twitter: "@denise12", instagram: "denise12") var c3 = ExtendedContact(name: "Francis", contact: 538427, twitter: "@fran1", instagram: "fran1") var c4 = ImportantContactInfo(name: "Simon", contact: 7238842, address: "Alberta", socialSecurity: 938239420) var c5 = ImportantContactInfo(name: "kevin", contact: 643984345, address: "hong Kong", socialSecurity: 863847453) |
Notice that these contacts are not identical because it is created from different subclass, however, they are from the same parent class. We can create a list that holds all these contact using base class. See code below:
var masterList = [BasicContact]()
masterList += [c1, c2, c3, c4, c5] |
We can query the properties, however, the properties are limited to the base class.
masterList[3].name
masterList[3].contact |

We can print a list of name as follows:
for each in masterList {
print("Name: \(each.name)") } |

We can also ask the contact in the list to perform the displayIdentity method so that we know which contact belongs to which.
for each in masterList {
print("Name: \(each.name) \t Contact: \(each.contact) \t") each.displayIdentity() } |
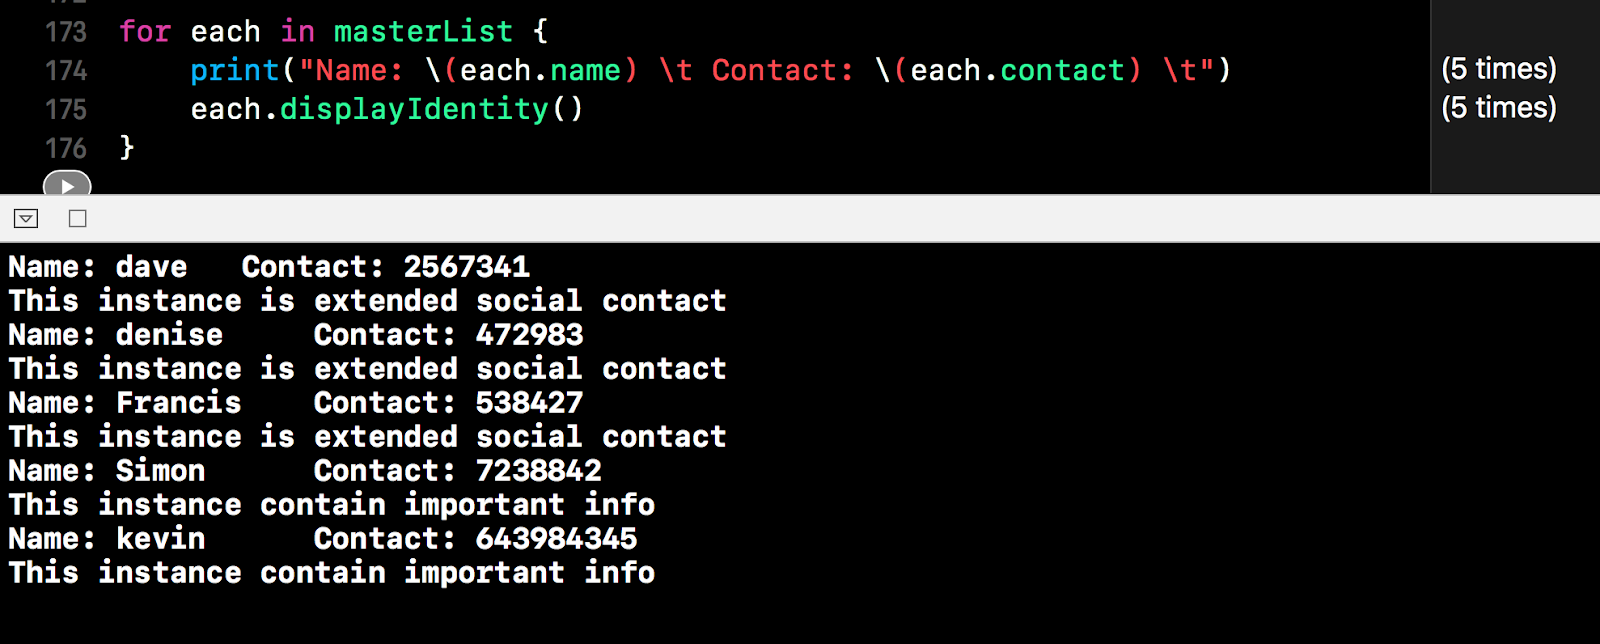
Since displayIdentity has been overridden in every subclass. The method actually runs for each subclass instead of using the method in the base class.
We can also count each contact for each subclass. However, we need to introduce "is" keyword. This keyword help to check if an instance belongs to a class.
var totalSocialContact = 0
var totalImptContact = 0 for each in masterList { if each is ExtendedContact { totalSocialContact += 1 } else if each is ImportantContactInfo { totalImptContact += 1 } } print("Out of \(masterList.count) contact. \(totalSocialContact) of them belongs to social contact whereas \(totalImptContact) are important contact.") |

Using the master list, we can also extract information that are specific to the subclass. Let's say that we want to extract the social security number for those important contact. We would use type casting to perform such operation. We use keyword "as!" to ask the system to treat the contact as one of the subclass. This is also known as down casting
for eachContact in masterList {
if eachContact is ImportantContactInfo { let imptContact = eachContact as! ImportantContactInfo print("Contact \(imptContact.name) has social security \(imptContact.socialSecurity!)") } } |
The code above will check if the instance is the same as ImportantContactInfo. If it is the same then we create another instance (imptContact) and ask the system to create such an instance by downcasting the original instance (eachContact) into the subclass ImportantContactInfo. For those social account, the comparison failed in the if statement, so these social account will be ignored.

We can improve the code above by using optional binding. While using optional binding, we need to use another similar keyword "as?".
for eachContact in masterList {
if let impt = eachContact as? ImportantContactInfo { print("Contact \(impt.name) has social security \(impt.socialSecurity!)") } } |
Optional binding will cast each instance into the subclass. Those social account will failed the type casting and thus throw out of the optional binding loop. If the casting is successful, then we can work the variable (impt )as if it is an instance of the subclass ImportantContactInfo.

***