In this session, we will be adding navigation controller to our table view controller. We will also be using more than one view controller.
The reason for setting up more than one view controller is because when we use table view controller, very often, we would like to drill down from the table and look at the details of each item we have selected. To achieve such task, we need a table view controller and a normal view controller. The table view controller will display a list of items in a table format. A normal view controller will display the details of the selected item.
In addition, we need a navigation controller to navigate from the table view controller to the detail view controller. We may also need to reverse back or unwind from detail view controller to table view controller. Detail view controller is a normal view controller that inherit from UIViewController.
So for such an application to work, we need one table view controller, one normal view controller (for details) and one navigation controller. The table view controller and the normal view controller need to link to the corresponding view controller file.
Now, lets start with a single view application. Create a single view application as shown below:

Named the project as "Intro18"

Click Next and click Create in the next page where usually we leave the location as default.
Once the project is created remove the check box under Landscape Left and Landscape Right. We would like this app to be in portrait mode.

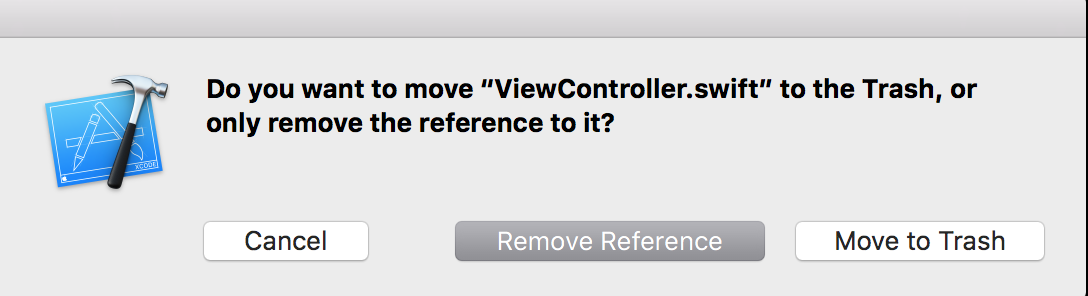
Now, lets remove the default view controller. Select the file from project navigator and press Delete follow by "Move to Trash".
Next we select the view controller as shown below

Press the delete button to delete the view controller. The resulting storyboard should be empty as shown below.

Next, go to the object library, scroll a bit down to look for Table View Controller and drag it to the storyboard.

The resulting storyboard should be like the screen shot below:

Now, we need to create the corresponding file for the table view controller. Create a new file as shown below:

Under iOS > Source, select Cocoa Touch Class. Click Next.

Under "Subclass of", select UITableViewController. The name of the class will automatically appended with TableViewController. We need to name this table view controller. Under Class, go to the first character and enter BookList. Do not remove the appended name behind. So the full name for this file should be BookListTableViewController. Click Next and Create.

The new file should be same as the screen shot below.

Next, to link the table view controller to the file. Select the table view controller as shown below:

Under Identity Inspector, change the class to the same name as the file we have just created. In this case, the file name is BookListTableViewController.

Next, go to the Attribute Inspector. Make sure that the check box for "Is Initial View Controller" is checked as shown below.

Next select table view cell from the document outline.

Under the Attribute Inspector, change the Style from custom to Basic and named the reuse identifier as "BookListCell".

Once the style is changed to basic, a label will be added to the table view cell. We can drill down the document outline to confirm that, as shown below.

Next, we want to create a separate data file. In the previous session, we create data in the view controller since the data set is small. However, for best practice and conform to the MVC, it is better for us to create a separate Swift file. Go to File and New and File as shown below

Under iOS > Source, select Swift File and click Next.

We named the file as Book.swift as shown below. Click Create to create the file.

Under the new file, create the data structure as the following code:
struct Book {

    var bookTitle: String
    var bookSummary: String

}
Screen shot as shown below:

Next, go to the table view controller file and set up the sections as shown below:

Under properties, create an array using the follow code in the screen shot:

After the properties section, create another section shown below:
Create a set of sample book data as shown below:
    // MARK: Helper function to load sample book
    func loadSampleBook()  {

        let book1 = Book(bookTitle: "Book Title 1", bookSummary: "Book 1 Summary")
        let book2 = Book(bookTitle: "Book Title 2", bookSummary: "Book 2 Summary")
        let book3 = Book(bookTitle: "Book Title 3", bookSummary: "Book 3 Summary")

        bookList += [book1, book2, book3]

    }
Screen shot below:

Now, we should be familiar with the step in setting up table view. The next step should be setting up the data source.

We also need to un-comment the following section and populate the table view cell with the specific data.

For data source, the section remain to be 1. See below.

The number of rows will be the array count of the bookList as shown below:

For the configuration of table view cell. First we need to change the reuse identifier. To configure the cell, we need to pass each item in the book list using indexPath to a local variable and then we assign the value of book title to cell.textLabel.text as shown below.

Please do not forget to add the function loadSampleBook() under viewDidLoad( ) template.

Now, we can run the app to see of the book data is listed in the table as shown below. If we encounter any problem, we should look at the steps carefully and repeat each step.

If we are using local repository, this is a good time to commit the files, so that if we mess up the following code we can always discard changes.
The following section will involved in creating a navigation controller. Select the table view controller as shown below:
The following section will involved in creating a navigation controller. Select the table view controller as shown below:

Go to Editor > Embed In > Navigation Controller as shown below:

The system will add a navigation controller in front of the table view controller. At the same time a navigation bar will be created on the top of the screen. see below.

Double click the center of navigation bar and enter the title as "Book List" as shown below:

If we run the app again, the table becomes more presentable as shown below:

The previous section is nothing new to us except that we just a navigation controller. The following section will add additional view controller to display the data details.
First select view controller from the object library and drag to any empty space on the storyboard.

A new view controller will be created and it might be overlapping existing UI. Move the view controller to the empty space to the right next to the table view controller.

Next, we need to create a file for this new view controller. Go to File > New > File, select Cocoa Touch Class. Make sure the source is under iOS.

Click Next and choose the subclass to UIViewController. Insert the name BookDetail in front of ViewController.

Click Next and click create. The new file should be similar to the screen shot below.

Scroll down the view controller and remove the commented Navigation portion. The resulting code should be similar to the code below.

Now select the view controller as shown below.

On the Identity Inspector, select the class BookDetailViewController to link the file to this UI.

Now select the BookListCell as shown below.

Control and drag from the selection (Blue bar) to the new view controller. When release, we will be given the following Segue box for selection. In this case, select Show. This is to tell the system that Show is the drill down from the table view cell.

An arrow will be created to link the table view controller to the view controller.

The whole storyboard view is shown below

Notice that a navigation bar is created for the view controller. This is the feature for Show segue. Now we can drag a label to the view controller as shown below.

Select the label and on the Attribute Inspector center the label as shown below.

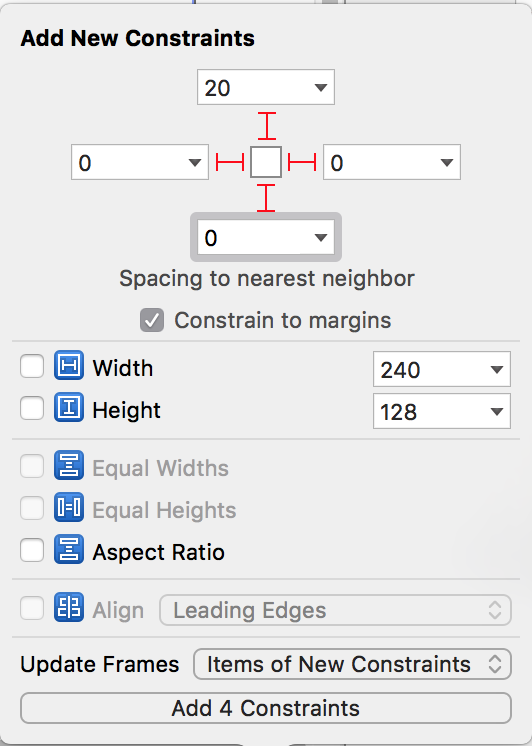
The auto layout for label should be as below.

Next, find an object Text View from the object library as shown below.

Drag the text view to the view controller just below the label.

The auto layout for text view is shown below.
The resulting view controller should be similar to the screen below

Now select the tex view and on the Attribute Inspector remove the check box Editable. In this project we will be just showing the details. User cannot edit it.

Now, we can work on the view controller file. Select the file BookDetailViewController and setup the section as shown below.

Now, go to the storyboard and select the view controller. Then switch to assistant editor mode.
Now, we need to link the label and textview to our view controller file. The connection detail for label is as follows:

The connection details for text view is as follows:

The resulting code is as follows:

Next, we need to add an optional variable know as detailBook so as to present the details in this view controller.

Next, switch to the table view controller as shown below.

On the table view controller, scroll to the end and we will find a block of code under the section Navigation called prepareForSegue.

We need to un-comment the function as shown below. This function will be activated when a segue is triggered. A segue is a transition between view controller. This function allow us to prepare the details of the selected data and pass it to the view controller.

We need to populate the following code
    // MARK: - Navigation

    // In a storyboard-based application, you will often want to do a little preparation before navigation
    override func prepareForSegue(segue: UIStoryboardSegue, sender: AnyObject?) {
        // Get the new view controller using segue.destinationViewController.
        let showBookDetailViewController = segue.destinationViewController as! BookDetailViewController

        // Pass the selected object to the new view controller.
        if let selectedCell = sender as? UITableViewCell {

            let selectedIndexPath = tableView.indexPathForCell(selectedCell)!
            let selectedBook = bookList[selectedIndexPath.row]
            showBookDetailViewController.detailBook = selectedBook
        }

    }
As mentioned in the comment, we need to create an instance of destination view controller using the template we had setup. Next, we test if the selected cell of this segue was trigger by table view cell. If the segue is triggered by the table view cell, then we need to find the index path using a method from table view. Then we need to retrieve the data from the array using the index path we extracted from the previous statement. Finally, we will pass the data details to the destination view controller.
Screen shot shown below

Now, we need to go back to the book detail view controller. We use optional check to see if there is any data in the variable detailBook. If there is then we will transfer the details to the label and text view. This section of the code should be in viewDidLoad()
    if let gotBookToShow = detailBook {

            bookDetailTitle.text = gotBookToShow.bookTitle
            bookDetailSummary.text = gotBookToShow.bookSummary
        }

Now lets run the app and we will be given the presentable table view. Select any book and the screen will segue to the next view controller.

The details is shown in the view controller. To go back, we just need to click the Book List and it will go back to the table view.

A copy of this project can be found at Github at https://github.com/SwiftiCode/Intro18
*** End ***
No comments:
Post a Comment