While developing app for iOS, we will be encountering situation where we need to display a list of name or numbers etc. A table comes in handy during such situation. Luckily iOS framework provide the necessary API so that creating table will be easy. So lets dive into tables.
To use table, we must use UITableViewController which is a subclass of view controller. This view controller will be responsible for displaying the data we supply. Most of the function such as displaying items are already programmed, we just need to supply the data source and tell the API how many sections and rows in our table.
Each table view controller contains cell or rows which is an instance of UITableViewCell. We could customised each table view cell according to our preference. The most important note about table view cell is that we need to set the cell reuse identifier. This is the basic requirement when configuring table.
In summary, the basic steps in configuring a table in iOS app is as follows:
Under Table View Controller UI
- Add a table view controller UI to the storyboard.
- Add a table view controller file and link to the UI in the storyboard.
- Under table view cell set the cell reuse identifier.
Under Table View Controller File
- Configure the number of section of your table under the function numberOfSectionsInTableView.
- Configure the number of rows of your table under the function: override func tableView (tableView: UITableView, numberOfRowsInSection section: Int).
- Uncomment the section: override func tableView(tableView: UITableView, cellForRowAtIndexPath indexPath: NSIndexPath) -> UITableViewCell. Change the "reuseIdentifier" to the reuse identifier that we have set on the UI. Populate each cell using the indexpath of the program.
We will go through table construction for the next few session so that we are familiar with this function.
For a start, let create a single view application project and named as "Intro16" as follows:

Now, we need to delete the default view controller in the UI and the file. First select the view controller in the UI as follows. Hit the delete button and the UI should be gone.

Next, select the view controller file as shown below.

Hit the delete button and we would be shown the following dialogue box. Click on "Move to Trash" to delete it.

Now the project should be without any view controller as shown below.

Under the object library. Select Table View Controller and drag it to the storyboard.

The storyboard should look similar to the screen shot below

Under attribute inspector make sure the box "Is initial View Controller" is ticked as shown below.

Next, we need to add a new file for table view controller. Create a new file as follows:

Select iOS -> Source and select Cocoa Touch Class.

Select the subclass to UITAbleViewController and enter the name of the table view controller. In our case named it with prefix "MyNameList..." and the system will complete the rest for us as shown below.

Click Next and select the location of the file which is usually the default. Click create after that. A new file will be created as shown below.

The table view controller file should be same as the screen shot below.

Finally, we need to link the file to the UI in the storyboard. In the UI, go to identity inspector, make sure that custom class name is change to MyNameListTableViewController.

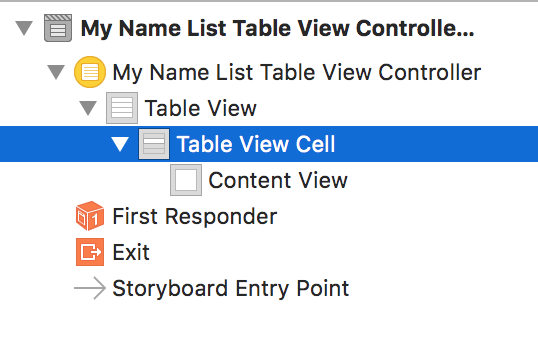
Under document outline, we should see the object hierarchy as follows:

Select Table View Cell.
Under attribute inspector, change the Style to Basic and set the reuse identifier (highlighted in the screen shot below) to "myNameListCell".

Once we change the style to basic, the system will add a label written as "Title" under Prototype Cells as shown below.

Also notice the changes in the document outline.

If we try to run the app, the app will show something similar to the screen shot below.

Before we start to configure the data source in the table view controller, we need to create data. Lets create an array as follows:
// MARK: Properties
let myNameList = ["Steve", "Adam", "Bob", "Calvin", "Ivan"]

Next, we look for the function numberOfSectionsInTableView as shown below.
Since this is a simple table with only one section, we need to change from return 0 to return 1 as shown below.


Next, we look for the function with a parameter named as numberOfRowsInSection.

In this function we need to return number of rows for the table. We just need to return the number of count (myNameList.count) in the array as shown below.

Just below the previous function, we have the function with parameter cellForRowAtIndexPath as shown in the screen shot.

We need to remove the comment which is a slash follow by * and a * follow by slash.
This is the function that populate each cell with the data source. First we need to change the reuseIdentifier to the name we just set in the UI. Next under the configure cell we need to populate each cell with our array. The label added under basic style is textLabel. The whole code is as follows:
This is the function that populate each cell with the data source. First we need to change the reuseIdentifier to the name we just set in the UI. Next under the configure cell we need to populate each cell with our array. The label added under basic style is textLabel. The whole code is as follows:
override func tableView(tableView: UITableView, cellForRowAtIndexPath indexPath: NSIndexPath) -> UITableViewCell {
        let cell = tableView.dequeueReusableCellWithIdentifier("myNameListCell", forIndexPath: indexPath)

        // Configure the cell...
        let singleName = myNameList[indexPath.row]

        cell.textLabel?.text = singleName

        return cell
    }
Screen shot as follows:

Now, we can run the app and it should show something like the screen shot below.

As you can see, the screen on the top is quite squeezed. This is because we did not add a navigation controller. We need navigation controller especially when we need to drill down the data from the table.
For now lets settle with the app and we move to the next session where we discuss about navigation controller and displaying data details.
A copy of this project can be found at Github at https://github.com/SwiftiCode/Intro16
*** End ***
No comments:
Post a Comment