In this session, we will be focusing on setting user alert. At times, we need to alert user in response to certain event. Setting user alert is useful because in iOS alert system, everything will stop and user must response to the alert before the program is to move forward.
We do not need UI to setup for alert. Alert system is usually programmatically trigger. However, for demonstration purpose, we will create individual button to trigger the alert.
Let us first set up the environment. Create a single view application project as follows:

Lets named this project as "Intro15"

Next, we need to setup the sections in view controller. Select view controller and set up various section as shown below:

Before we start the programming, lets us briefly go through the alert system. Please note that the new system we are going through was introduced in iOS 8. Previous method of delivering alert has been deprecated.
In iOS system, the alert system is controlled by a subclass of UIViewController known as UIAlertController. So to create an alert, we must create an instance or object using the class UIAlertController. While creating an instance, we must supply the title, message and preferred style. Both title and message are in string format. Preferred style is in enumeration formation. There is only 2 option, it is either alert or action sheet. We will explain action sheet later.
Once an alert object is created, we need to present the alert controller using the same method as presenting view controller since alert controller is the sub class of view controller.
If we create an alert and present the alert controller. The whole program will halt, we will not be able to carry on. This is because before we present the view controller, we must add at least one alert action. This action is UIAlertAction. Once we created an instance of UIAlertAction, we need to add this action to the alert controller.
In summary, please follow the steps below:
- Create an instance of alert controller and supply title, message and preferred style. (UIAlertController)
- Create an instance of at least one alert action. (UIAlertAction)
- Add the alert action to the alert controller. (Use method addAlertAction)
- Present alert controller. (Use presentViewController)
We will be creating 5 alert for this session, so we need to create a total of 5 button. In Addition, for alert 3 we will be utilizing an additional textfield and label.
Alert Example 1
Lets create each button one by one. First drag a button to the storyboard. We name the button as "Trigger Alert 1" as shown below:

We will not be focusing on auto-layout, therefore we just align the UI more to the left.
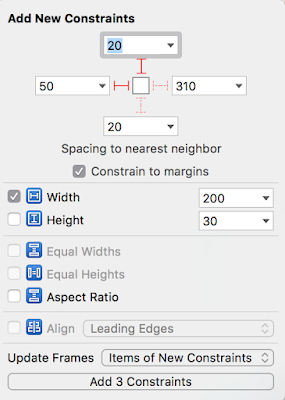
The auto-layout for the first button is as follows. Beside the left and top alignment, please do not forget that we also need to fixed the width of the button.

The resulting UI is as shown below:

Next, we need to switch to assistant editor mode in order to link the button to view controller.

The screen should be similar to the screenshot below.

Next, we need to control+drag the button to the line just below "// MARK: Alert Action 1 and Alert Action 2". Use the settings as shown below:

The resulting code should be same as the screen below:

Next, we will switch back to standard editor mode.

Now we will start coding in the alertAction1.
@IBAction func alertAction1(sender: UIButton) {

        // Create alert controller
        let alertControl1 = UIAlertController(title: "Warning", message: "Beware! You have been warned!", preferredStyle: .Alert)

        // Create alert action
        let alertActionOk = UIAlertAction(title: "OK", style: .Default, handler: nil)

        // Add alert action to controller
        alertControl1.addAction(alertActionOk)

        // Present alert view controller
        presentViewController(alertControl1, animated: true, completion: nil)

}
The screenshot is as shown below:

The code is basically break into 4 section according to our step. First, we create an alert controller named as alertControl1 with simple title and message. The preferred style is alert. Next we create an instance of alert action named as alertActionOk. Then we add the alert action to the controller using the addAction method. Finally, we present the view controller.
Now lets test run the app. The initial screen should be same as below:
Now lets test run the app. The initial screen should be same as below:

Now, click on the button and the following alert will appear.

To carry on, we just need to click on OK. The former screen will resume.

This also proves that we need a minimum of at least one alert action.

Auto-layout for the button is as follows:
Please take note of the width. The resulting storyboard should be something similar to the screen shot below.

Next, we will connect the second button to the view controller. Switch to assistant editor mode and connect the second button to the view controller.

It is best to place the code just after the first alert program.

Next, we will program the second alert as follows:
Screen shot as follows:

The second alert is almost the same as the first alert except that the alert action include extra code for the handler. Handler is where we tell the alert action to do something when use click on the button. In the first alert, the handler is nil. Therefore, when we hit ok, it do nothing.
On the second alert, we include a print statement. Please note that the print function will not print something on the app screen. On Xcode it will print to the console log.
Lets examine the code in the handler. This type of code is called closure. Closure is a type of function with no name. There are a few ways to add closure to the handler. Please examine carefully each cases as we present them.
Now, we can test the app.

Now, click on the second button to trigger the alert.

The console should be something like below.


Auto-layout for the button is as follows:

Then, we will add a textfield and label as shown below.

Auto-layout for textfield and label should be the same as below:

The resulting screen should be as follows:
 The attributes for textfield should be set as the screenshot below:

The rest of textfield settings is as follows:

The settings of label is basically center the text.

The final screen should be as follows:

Next, we will connect the the textfield as below.

Connect the label as below

Finally, we connect the third button as below.

The code for the properties should be as below:

The code for the button should be as follow. Please take note that we mark a new section so that it is easy for us to find the code.

In addition, we will also create a new function just below the program of the third button.
Screenshot as below:

Next we will add the code for the third program.
Screen shot as shown below:

For the third button, we add an additional alert action to cancel the alert. Please note that there are 2 lines in the closure and we use semicolon to separate the command.
For the alert action ok, instead of using closure, we use a separate function to act as handler. Thats why we need to create the function first before we add the alert action without error.
The program for the function alert3OkHandlingProcess is as follows:
Screen shot:

Next, we need to add the protocol for textfield as follows:

Mark another section just before the alert action program and create the helper function textfieldShouldReturn as follows:
Screen shot as below:

Since, this is just for demonstration purpose, when we finish the texfield, we must always hit return. Otherwise, the keyboard would not hide. We need to delegate the helper program to itself in the viewDidLoad program as shown below:

Now, we can test the app.

Alert Example 2
On the same project, we create the second alert example. Drag a second button to the storyboard. The name of the button is "Trigger Alert 2" as shown below.
Auto-layout for the button is as follows:

Please take note of the width. The resulting storyboard should be something similar to the screen shot below.

Next, we will connect the second button to the view controller. Switch to assistant editor mode and connect the second button to the view controller.

It is best to place the code just after the first alert program.
Next, we will program the second alert as follows:
@IBAction func alertAction2(sender: UIButton) {

        // Create alert controller
        let alertControl2 = UIAlertController(title: "Alert 2", message: "Your action will be process", preferredStyle: .Alert)

        // Create alert action
        let alertActionOk = UIAlertAction(title: "Ok", style: .Default, handler: { (action:UIAlertAction) -> Void in print("Will processing alert 2 trigger...") })

        // Add alert action to controller
        alertControl2.addAction(alertActionOk)

        // Present alert view controller
        presentViewController(alertControl2, animated: true, completion: nil)

}
Screen shot as follows:

The second alert is almost the same as the first alert except that the alert action include extra code for the handler. Handler is where we tell the alert action to do something when use click on the button. In the first alert, the handler is nil. Therefore, when we hit ok, it do nothing.
On the second alert, we include a print statement. Please note that the print function will not print something on the app screen. On Xcode it will print to the console log.
Lets examine the code in the handler. This type of code is called closure. Closure is a type of function with no name. There are a few ways to add closure to the handler. Please examine carefully each cases as we present them.
Now, we can test the app.

Now, click on the second button to trigger the alert.

The console should be something like below.

Alert Example 3
Our third alert example will get more complicated. In this example, we will also add a textfield and a label. But first, lets add a third button. The settings is as below:
Auto-layout for the button is as follows:

Then, we will add a textfield and label as shown below.

Auto-layout for textfield and label should be the same as below:

The resulting screen should be as follows:


The rest of textfield settings is as follows:

The settings of label is basically center the text.

The final screen should be as follows:

Next, we will connect the the textfield as below.

Connect the label as below

Finally, we connect the third button as below.

The code for the properties should be as below:

The code for the button should be as follow. Please take note that we mark a new section so that it is easy for us to find the code.

In addition, we will also create a new function just below the program of the third button.
func alert3OkHandlingProcess(action: UIAlertAction) {


}
Screenshot as below:

Next we will add the code for the third program.
// MARK: Alert Action 3
@IBAction func alertAction3(sender: UIButton) {

        // Create alert controller
        let alertControl3 = UIAlertController(title: "Alert 2", message: "Your action will be process", preferredStyle: .Alert)

        // Create alert action
        let alertActionCancel = UIAlertAction(title: "Cancel", style: .Cancel, handler: { (action:UIAlertAction) -> Void in print("Canceling..."); self.alert3Label.text = "Alert 3 just cancelled!" })

        let alertActionConfirm = UIAlertAction(title: "Confirm", style: .Default, handler: alert3OkHandlingProcess)

        // Add alert action to controller
        alertControl3.addAction(alertActionCancel)
        alertControl3.addAction(alertActionConfirm)

        // Present alert view controller
        presentViewController(alertControl3, animated: true, completion: nil)


}
Screen shot as shown below:

For the third button, we add an additional alert action to cancel the alert. Please note that there are 2 lines in the closure and we use semicolon to separate the command.
For the alert action ok, instead of using closure, we use a separate function to act as handler. Thats why we need to create the function first before we add the alert action without error.
The program for the function alert3OkHandlingProcess is as follows:
func alert3OkHandlingProcess(action: UIAlertAction) {

        if alert3TextField.text?.isEmpty == true {

            alert3TextField.text = "Default"
        }

        alert3Label.text = alert3TextField.text!

        print("Confirmed!!!")

}
Screen shot:

Next, we need to add the protocol for textfield as follows:
Mark another section just before the alert action program and create the helper function textfieldShouldReturn as follows:
// MARK: UITextFieldDelegate
func textFieldShouldReturn(textField: UITextField) -> Bool {

        textField.resignFirstResponder()

        return true
}
Screen shot as below:

Since, this is just for demonstration purpose, when we finish the texfield, we must always hit return. Otherwise, the keyboard would not hide. We need to delegate the helper program to itself in the viewDidLoad program as shown below:

Now, we can test the app.

Click on the textfield and the keyboard appears (Use Command+K to toggle keyboard).

Click return when finish. Next click to trigger the alert.

Click cancel first and the label changes.

The console log should be as follows:

Now click on the button again and this time click confirm. Notice how the label changes to whatever is typed in the textfield.


Click return when finish. Next click to trigger the alert.

Click cancel first and the label changes.

The console log should be as follows:

Now click on the button again and this time click confirm. Notice how the label changes to whatever is typed in the textfield.

The console log is as follows:

Alert Example 4
The next alert example is still based on the 4 steps, but we use action sheet as the preferred style. In addition, we are going to do multiple level action sheet. Please examine the code carefully. But let us add a new button below the label. The auto-layout of the button is as follows. Please note that we are setting the button slightly further apart from the previous buttons and label.
The name of the button is "Trigger Alert 4"

The resulting layout show be similar to screen shot below:

Next, we link the button to the view controller as follows:

We will be marking a separate section for alert 4 as shown below.

In addition, please create another helper function called responseHandler( action:UIAlertAction ) as shown below:

The code for alert 4 is as follows:
// MARK: Alert Action 4
    @IBAction func alertAction4(sender: UIButton) {

        // Create alert controller
        let alertControl4 = UIAlertController(title: "Selection", message: "Make a Choice:", preferredStyle: .ActionSheet)

        // Create alert action sheet
        let select1 = UIAlertAction(title: "Option1", style: .Default, handler: responseHandler)

        let select2 = UIAlertAction(title: "Option2", style: .Default, handler: responseHandler)

        // Action sheet 3 with sub action sheet
        let select3 = UIAlertAction(title: "Option3", style: .Default) { (action:UIAlertAction) -> Void in

            // Create action sheet within action sheet

            // Create sub option controller
            let option3AlertControl = UIAlertController(title: "Option 3", message: "Choose Sub Option", preferredStyle: .ActionSheet)

            // Create action sheet for sub option
            let subOptionA = UIAlertAction(title: "Option3A", style: .Default, handler: self.responseHandler)

            let subOptionB = UIAlertAction(title: "Option3B", style: .Default, handler: self.responseHandler)

            // Add sub option
            option3AlertControl.addAction(subOptionA)
            option3AlertControl.addAction(subOptionB)

            // Present view controller for sub option
            self.presentViewController(option3AlertControl, animated: true, completion: nil)

        }

        let selectCancel = UIAlertAction(title: "Cancel", style: .Cancel, handler: nil)

        // Add alert action to controller
        alertControl4.addAction(select1)
        alertControl4.addAction(select2)
        alertControl4.addAction(select3)
        alertControl4.addAction(selectCancel)

        // Present alert view controller
        presentViewController(alertControl4, animated: true, completion: nil)

    }
Action sheet allow us to provide more option for user to choose. The buttons in action sheet is stack on top of each other (See screen shot for app testing below).
We use an alert to response to action sheet. However, in real world practice, we should be creating different program or function in order to response to user selection.
The alert action is similar to what we have done before. Notice how option 3 closure is constructed. The alert function argument was closed follow by open braces. This is another way of constructing closure. Please also note that since there are multi-level of alert controllers. We need to use self keyword to identify the alert controller we are working on. Except for the nested alert the rest is quite straight forward.
Screen shot below:

The helper function is as follows:
func responseHandler(action:UIAlertAction)  {

        let alertUserBack = UIAlertController(title: "Your Selection", message: "You Chose " + action.title!, preferredStyle: .Alert)

        let alertUserBackOK = UIAlertAction(title: "OK", style: .Default, handler: nil)

        alertUserBack.addAction(alertUserBackOK)

        presentViewController(alertUserBack, animated: true, completion: nil)
}
The helper program is just another simple alert in response to users choice. Please note how the message is constructed.
Screen shot as shown below:

To test the alert, run the app.

Click on the fourth button to trigger the alert.

If we click Option1 or Option2, we will be shown the following alert.

Alert shown as below if we choose Option2.

If we choose Option3, it will trigger a sub alert for option A and option B.

Alert shown if we choose option A.

Alert shown below if we choose option B.

Fifth Alert Example
For the final alert example, we will be introducing a feature where we can add textfield in our alert to gather input from user. A typical example is the user login prompt. There are many ways to create user login prompt, one of them is to use the alert controller.First, we add the last button below the fourth button. The name will be different this time, we just named it "Trigger Login Alert Style" as shown below:

The auto-layout is as shown below:

The resulting layout is shown below:

Next, we connect the button as shown below:

Similarly, we also mark a separate section for this example:

We will also create another helper function called passwordConfigurationHandler (userPasswordTextField:UITextField) as shown below:

The code for the alert is as follows:
// MARK: Alert Action User Login
    @IBAction func userLoginAction(sender: UIButton) {

        // Create alert controller
        let userLoginAlertControl = UIAlertController(title: "Login", message: "Enter your ID and Password", preferredStyle: .Alert)

        // Add textField configuration to alert controller
        userLoginAlertControl.addTextFieldWithConfigurationHandler { (userIDTextField:UITextField) -> Void in
            userIDTextField.placeholder = "ID or email"
        }

        userLoginAlertControl.addTextFieldWithConfigurationHandler(passwordConfigurationHandler)

        // Create alert action
        let cancelLogin = UIAlertAction(title: "Cancel", style: .Cancel, handler: nil)

        let okLogin = UIAlertAction(title: "Login", style: .Default) { (action:UIAlertAction) in

            let userIDTextField = userLoginAlertControl.textFields![0] as UITextField
            let userPasswordTextField = userLoginAlertControl.textFields![1] as UITextField

            let userID = userIDTextField.text ?? ""
            let password = userPasswordTextField.text ?? ""

            print("User ID:", userID)
            print("Password:", password)

            print("Login process underway....")
        }

        userLoginAlertControl.addAction(cancelLogin)
        userLoginAlertControl.addAction(okLogin)

        presentViewController(userLoginAlertControl, animated: true, completion: nil)

    }
In this example, after we created the controller, we need to configure the textfield using the addTextField method. After we add the textfield, then we will proceed as per normal to create alert action and add the alert action back to the controller.
Please note that handling user login process securely is beyond the scope of this session. So the closure will be much more complicated in actual application.
Screen shot below (Screen shot is quite small, need to zoom in to see the code) :

The code for the configuration handler is as follows:
func passwordConfigurationHandler(userPasswordTextField: UITextField) {

        userPasswordTextField.placeholder = "password"
        userPasswordTextField.secureTextEntry = true

    }
Notice that we applied two different method of adding the textfield. In one of the textfield, we add a closure to handle the attributes of the textfield. For the password login, we passed the configuration to another helper. Notice an additional attribute beside the placeholder. We need to turn on secureTextEntry for password login.
Screen shot as shown below:

Now, we can test the last alert.

When the click on the last trigger button, the login prompt will be shown as below:

If we enter something in the textfield and click login, the log will be shown as below. The console log is just to test if the alert is working. In reality, we would handle the login process securely without revealing user password.

We hope that this tutorial of creating alert is useful for you. As we mentioned earlier this elegant method of creating alert was introduced not long ago, we might encountered older ways of creating alert.
A copt of this program can be found at Github at https://github.com/SwiftiCode/Intro15
*** End ***